vRealize Automation 102
- Brock Peterson

- Apr 24, 2021
- 4 min read
Updated: Nov 30, 2025
In our last vRealize Automation (vRA) blog post we discussed the cluster architecture. This time we're going to discuss Cloud Assembly, most often used to create Cloud Templates that build and deploy VMs, Applications, and Services.

In this example, I'd like to create a Cloud Template that builds VMs. It'll give the user the ability to request the Operating System (OS), number of vCPUs, and amount of Memory. We'll take the disk defaults and provide the network via NSX.
First, let's create a Project to put our Cloud Template in. Think of Projects as folders that hold Cloud Templates with associated User and Provisioning capabilities.

We'll share this Cloud Template with all users via the User tab. The provisioning tab is where you'll specify the Zones that can be used when users provision VMs in this project.

Zones, or vRA Cloud Zones in this case, are sets of compute resources that can be used for provisioning within a specific cloud account and region. You can use constraints to control placement of compute instances within the available zones. Let's create the Cloud Zone for the vRA 102 Project, to be added above. For our vRA 102 Project, we are going to create a vRA 102 Cloud Zone.

Now that we have our Cloud Zone, let's add it to the vRA 102 Project.

We are going to give this Cloud Zone unlimited resources, so we'll keep the default values for Provisioning priority, Instances limit, etc.

We now have our vRA Project, in this case vRA Project 102.

We now have a place to put our Cloud Templates, so let's create one via the Design tab.
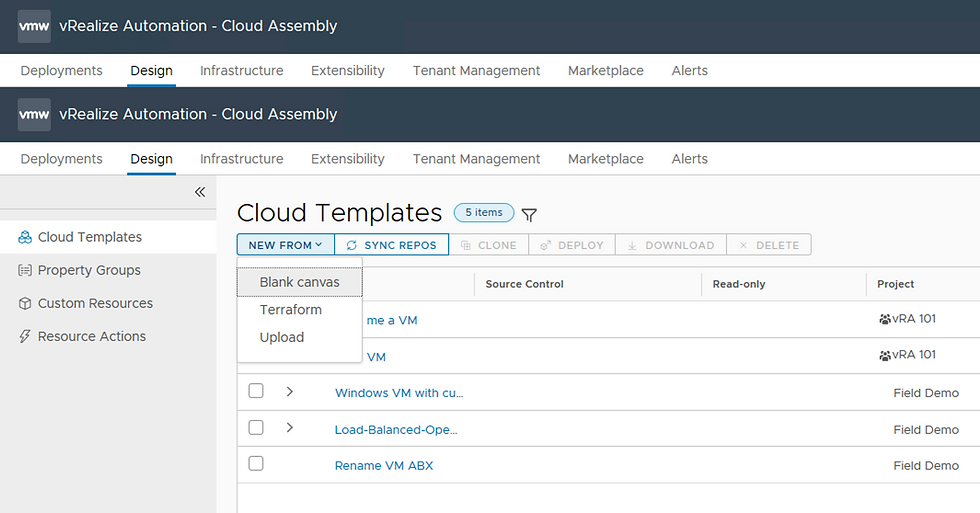
We can create one from scratch via the Blank canvas option, import one from HashiCorp Terraform via the Terraform option, or import one from another vRA environment via the Upload option. Let's create one from scratch by selecting Blank canvas and put it in the vRA 102 Project.

Now that we have our new Cloud Template, let's build it out.

We're given several Resource Types in the left pane: Cloud Agnostic, Kubernetes, vSphere, NSX, AWS, and more. These are the building blocks that we will use to construct our Cloud Template. In our case we'll use vSphere and NSX, as we're using NSX for networking in our lab. Drag and drop the vSphere Machine, vSphere Disk, and NSX Network objects over onto the canvas.

Connect the objects by click-dragging and notice the associated YAML in the right pane changes.

You'll notice the red error on the vSphere Machine Object in the canvas and the associated red error in the YAML. As you hover over the error, it will tell you what it is.

In this case, it's telling us that the image string within the "properties" object needs to be non-zero. If we click in the empty field, we are given options, these are the images (OS's) that I've already loaded.

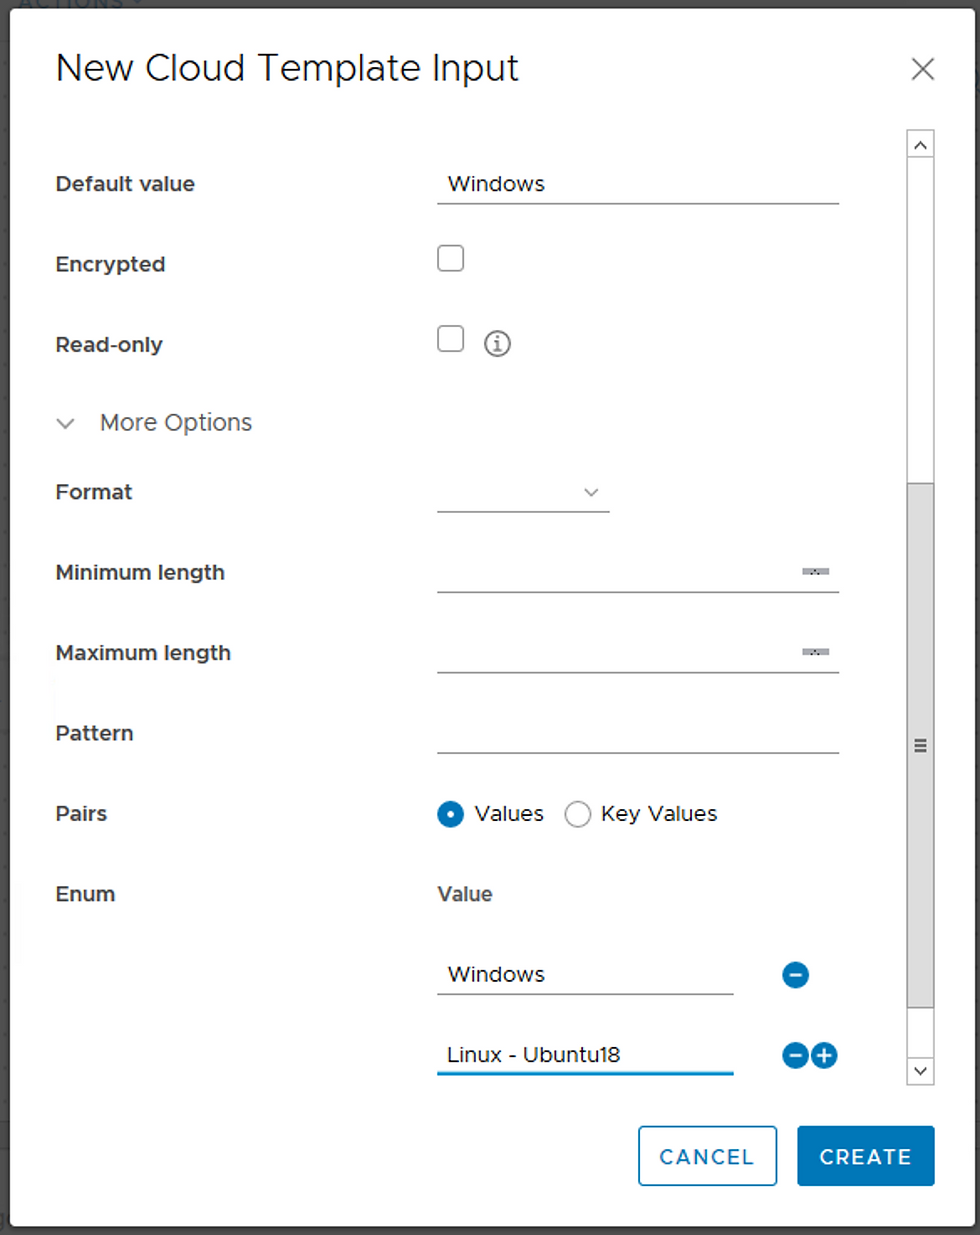
Rather than hard-coding an OS, vCPU count, and Memory amount, I'd like to take these as inputs from the user. Click the Inputs tab, then select NEW CLOUD TEMPLATE INPUT and you will be provided with the Input form.

We will configure three Input forms, one for OS (STRING), one for vCPU (INTEGER), and one for Memory (INTEGER). Here's the OS one, we've given Windows as the Default Value and an additional option of Linux - Ubuntu18.
The vCPU and Memory Template Inputs are similar, just using the INTEGER tab. We now have our three Inputs to the Cloud Template.
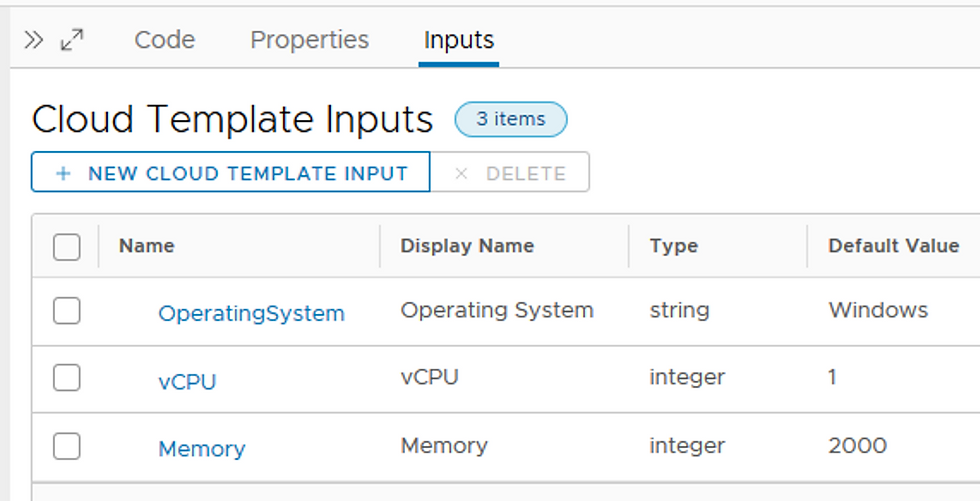
You'll notice these new Inputs will show in the Code tab.

We have Inputs for OS, vCPU, and Memory. Notice the image string in the properties object is still in error because it's empty. Let's assign it the OperatingSystem Input the user gives us. Let's do the same for cpuCount and totalMemoryMB. We'll take the Disk and Network defaults given to us, but we could have done something similar for them.

Before testing, we need to ensure our OS images are available: Windows and Linux - Ubuntu18. Go to Infrastructure - Configure - Image Mappings.

Here you'll see our image mappings. We have one for Windows, but we don't for Linux - Ubuntu18, so let's create it. Click NEW IMAGE MAPPING.

I gave my mapping a name and pointed at at the ubuntu-18 image previously loaded. You will be given the OS image options your Cloud Account is aware of, which can be found here. If you've recently added a new OS image, click the SYNC IMAGES button for an immediate sync.

At this point we're ready to test our Cloud Template.

Click TEST and you'll be given the Input Template to select your OS, vCPU, and Memory. In this example we'll test a Linux - Ubuntu18 build.

Click TEST.


Successful test! Let's put a Version on the template, by clicking the VERSION button and then release it to the catalog.

Before checking the Catalog, we need to add the Cloud Zone as a Content Source. Go to Service Broker - Content & Policies - Content Sources.

Click NEW and create a new Content Source that gets all Cloud Templates from the vRA 102 Project.

Our Cloud Template is now available to users as a Service Broker Catalog item.

Let's request one by clicking the REQUEST button.

We'll use Version 1, the Project associated with it is vRA 102 Project, I've given my VM a name and chosen the OS, vCPU, and Memory.

As an administrator of the environment, we can watch the request in vCenter.

And there's our VM! There are so many more things we can do with vRA Cloud Templates, this is our very first use case, but it's a popular one. More to come!


Comments