Deploying the VCF 9 Installer
- Brock Peterson

- Jul 8, 2025
- 1 min read
Updated: Aug 17, 2025
There are several ways to deploy VCF 9, one of them is via the VCF Installer, which is a wizard driven deployment methodology. Let's deploy VCF Installer and see what it looks like.
Log into the Broadcom Support Portal and search for VMware Cloud Foundation.

Once found, you'll notice the VMware Cloud Foundation Installer at the top, click View Group on the far right.

Download the VCF Installer (which is actually called the VCF-SDDC-Manager-Appliance) OVA by clicking the download link on the right. Once downloaded, log into vCenter and deploy like you would any other OVA.

Upload the OVA you just downloaded and click NEXT.

Provide a VM name and click NEXT.

Select a destination for the VM and click NEXT.

Review the details and click NEXT.

Review the EULA, click the I accept box, and click NEXT.
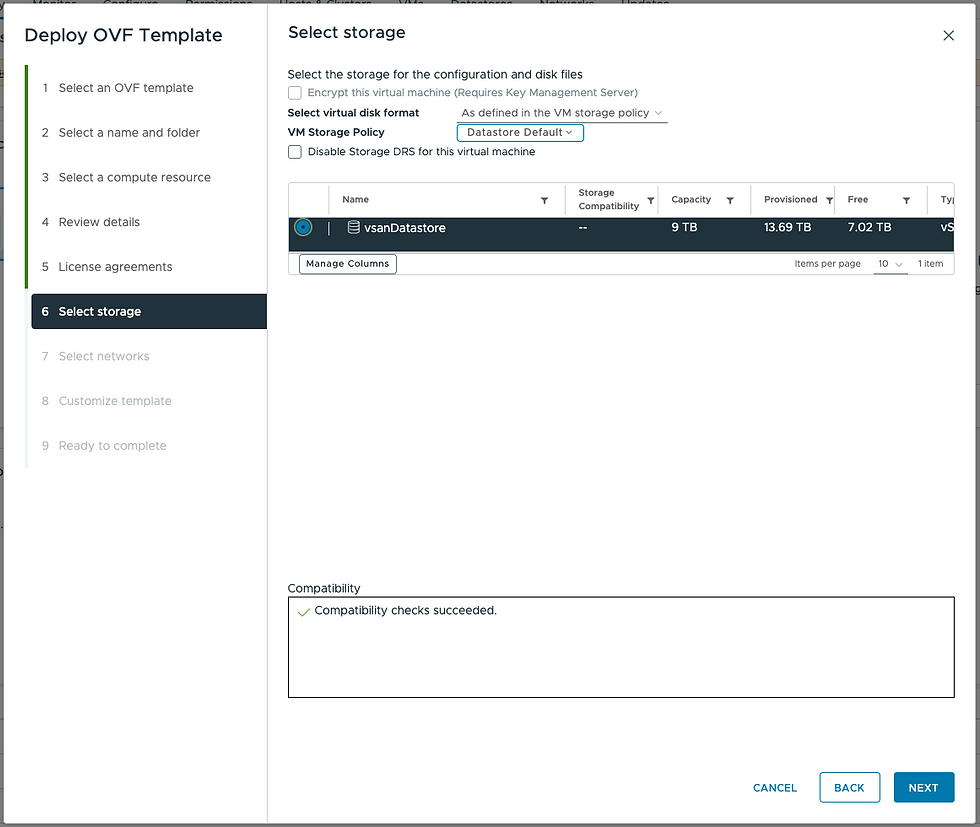
Select the storage destination and click NEXT.

Select the network destination and click NEXT.

Provide passwords, the local user password (which is admin@local), hostname, NTP, DNS, GW, NM, and IP. Click NEXT.

Confirm all is as expected and click FINISH. This will deploy the VCF Installer, once ready it'll be available at https://vcfinstallerfqdnorip.

Login with admin@local and the password you set at deployment.

You can now setup the Depot and Deploy, we will cover this in another blog.
Hey this was a nice blog but do you have any continuation of it for depot and deploy